Managing Notification Preferences
Introduction
Setting Email and Portal Notification Preferences
Step 3:- You will then be re-directed to the Manage Notifications page. All the checkboxes on the page will be default selected which means all email and portal notifications will be On by default. You can remove the checkbox selection of those activities for which you do not want to receive the email or postal notification and then click on the save button.
Delegating the Email and Portal Notifications by Business Admins

- For a few activities, only Business Admins receive the notifications (for example- Connect Activities). With this new feature business admins can delegate the email and portal notifications to any other staff so that the selected staff can receive the emails and portal notifications on behalf of the business admin.
- Refer to the below steps to delegate the notifications.
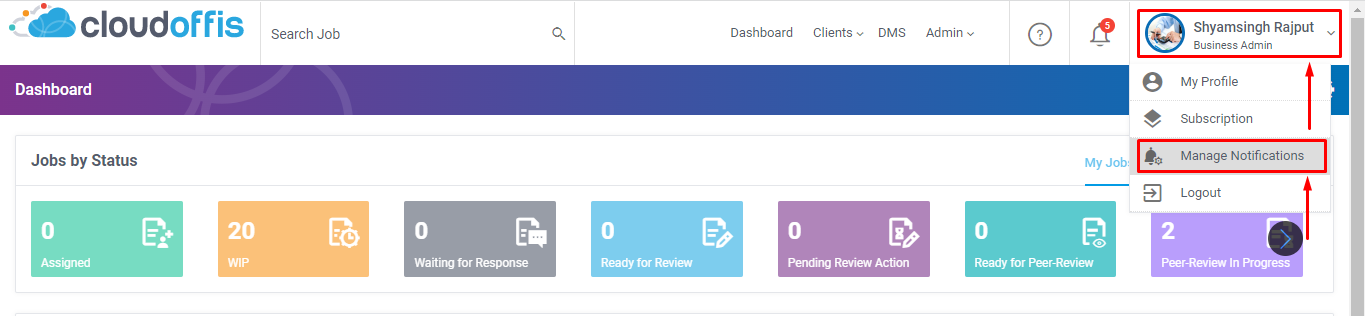
Step 1:- Once you log in to the platform, click on your Profile from the top right corner of the screen.
Step 2:- We have added a new page with the name Manage Notifications, click on it.
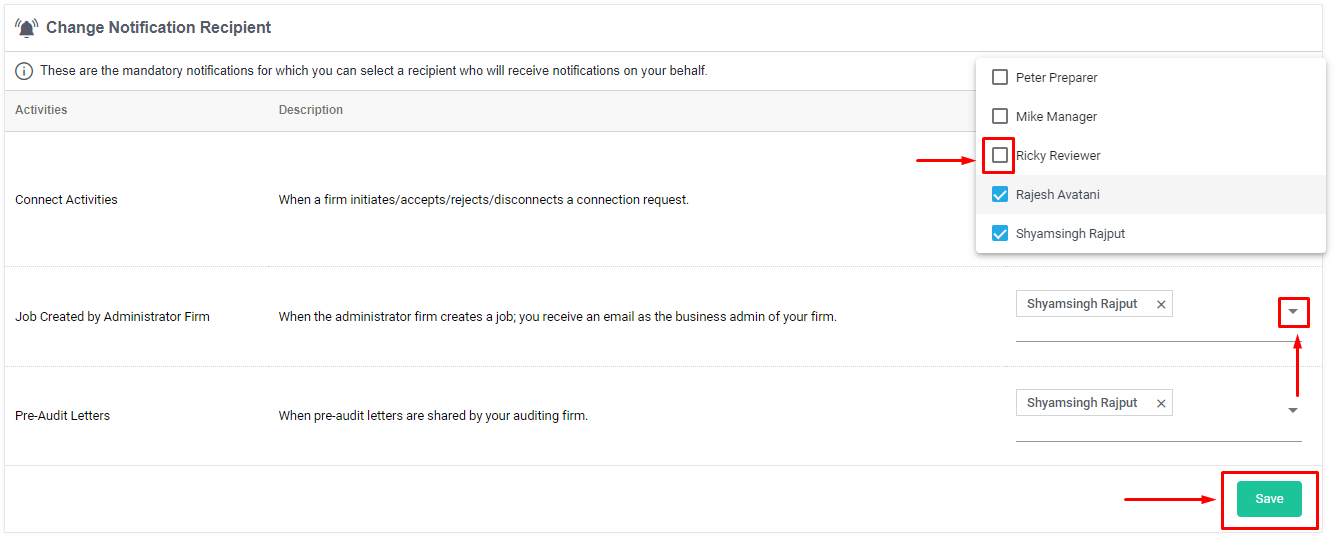
Step 3:- Go to the Change Notification Recipient section which is available below the Manage Notifications section.
Step 4:- Click on the drop-down select the recipient from the appearing list under the Recipient heading and click on the Save button.
Related Articles
SMSF Sorted Release v3.5
Introduction We are happy to announce the latest SMSF Sorted release v3.5. This release covers below important topics: Prepared By & Reviewed By Checkbox Selection at Heading Level We have enabled the selection of the Prepared By and Reviewed By ...Updating Company Details in Cloudoffis - SMSF Sorted
Change Request Form To update any of the details listed below, please fill out a Change Request Form. 1. Company Name 2. ABN 3. Business admin email address 4. Business name in the accounting software 5. Business code in the accounting software The ...Audit Basic portal for connected Auditors
Introduction We offer Auditomation Basic Portal for the connected Auditors who's accountants use SMSF Sorted Pro. Following are the functionalities and actions that can be performed by the auditors using the Auditomation Connected Portal. Referenced ...Managing Staff
Introduction This guide explains how to manage your staff members within your organization. You can view, create, edit, and deactivate staff members, as well as explore their roles and permissions. Creating a New Staff Member Step 1: Click on Admin > ...Managing Documents
Introduction The Document Management System (DMS) in SMSF Sorted is where all fund-related documents are uploaded, stored, and managed. It provides various functionalities for efficiently organizing and handling fund documents. Here's a breakdown of ...