Setting up MFA in SMSF Sorted
Overview
To provide better login security, we have introduced options for users to add Multi-Factor Authentication (MFA).

MFA is not mandatory in the system, and users can opt-in at any time, and disable later if desired.
Options
Cloudoffis provides three different options for MFA. This provides flexibility for users who may be using multiple devices
- Mobile device app, such as Google Authenticator
- SMS Text message
- Email authentication

You can opt to use one or more of these MFA options. Setting up more than one will provide you with alternative methods of logging in should you be unable to access your mobile phone as an example.
Setting up MFA
To start, click on the drop-down arrow next to your name in the top right corner of the SMSF Sorted window, then click My Profile.
Click on the Muti-Factor Authentication tab
If this is not visible, we recommend clearing the cache on your browser via pressing Ctrl & F5 together to force a refresh.
You will then be presented with the various MFA options
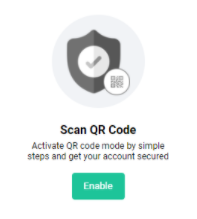
Scan QR Code
The first option available is to scan a QR code provided using apps such as Google Authenticator, Microsoft Authenticator or Authy.
Setup can also be done via a desktop/browser authenticator if you choose.
To start the setup, click the Enable button underneath the Scan QR Code option
Firstly, scan the code provided in the system with your authentication app of choice, or add the code manually into your app, then click Next
To complete the setup, enter the Authenticator code provided by your app, along with your SMSF Sorted login password
Once entered, click Verify Code.
You will then get a confirmation message.
You will then get a confirmation message.
SMS Text Message
The second option available is to receive an SMS text message
To start the setup, click the Enable button underneath the SMS Text Message option
Enter your Country and mobile phone number, then click Send Code
You will receive a text message with a one-time use code
To complete the setup, enter the code provided in the Text Message, along with your SMSF Sorted login password, then click Verify Code
Mail Authentication
The third option available is to receive an email to your nominated address with a verification code.
To start the setup, click the Enable button underneath the Mail Authentication option.
The following screen will appear. Click Send Code.
You will receive an email similar to below.
This code will then be used to confirm your authentication, along with your user password. Click Verify Code to continue.
You will then receive a confirmation message.
Logging into SMSF Sorted with MFA enabled
With MFA enabled, you will be prompted for your Authentication code after logging in with your SMSF Sorted username and password.
Depending on the method(s) you have chosen to setup, you will be able to enter the appropriate code from either text message, your authenticator app or the email received.
If you have more than one method enabled, e.g., Text and email, you will receive different codes for each method. Either code will be valid for three minutes after the receipt. If you are using an authenticator app, the expiry period for codes is shorter depending on the app used.
Disabling MFA
To disable one or more of the MFA options, click on the drop-down arrow next to your name in the top right corner of the SMSF Sorted window, then click My Profile
Click on the Muti-Factor Authentication ab
You will then be presented with the various MFA options.
Click the Disable button for the MFA option you wish to turn off.
You will receive a confirmation message.
Click Disable to continue.
The relevant option will then change to having an Enable button, rather than Disable.
Related Articles
SMSF Sorted Release 2.1
Release Contents Multi-Factor Authentication has been added to SMSF Sorted logins. This will require users to confirm their identity when logging in using a third-party application, such as Google Authenticator. Click here for more details in our ...SMSF Sorted - Getting Started Checklist
SMSF Sorted - Getting Started Checklist It's easy to get started with SMSF Sorted! We have put together this handy Checklist and a Tutorial Video Series to help you get Sorted. Step 1 - Follow the link in your Welcome Email to activate your SMSF ...SMSF Sorted release 3.1
Release Contents We are pleased to announce the release of our new data Sync feature which will help maintain data across both SMSF Sorted and Sorted Lite. Accountants and Administrators can now upload and bookmark documents in either Sorted Lite or ...Introduction to SMSF Sorted for Accountants connected to SMSF Sorted Administrator
Introduction to SMSF Sorted for Accountants connected to SMSF Sorted Administrator SMSF Sorted Enterprise provides a platform to accountants where they can connect with Administrator Firms and review the Workpapers of outsourced jobs to Administrator ...How to Link SMSF Sorted Enterprise to Sorted Lite
Introduction If you have activated Sorted Lite in Class you can link this to your SMSF Sorted Enterprise portal. Once linked, all users will have access to the Sync feature and will be able to transfer data between Sorted Lite and SMSF Sorted. Note - ...